Browse Category by Homemaking
Homemaking

Sushi making!

IMG_7203

Hello there! Have you ever made and eaten sushi before? I think everyone should try it at least once. I was intimidated to make it for so long because (1) it seemed complicated and time-consuming to make, (2) the ingredients were impossible to buy at Walmart, and (3) it really didn’t sound all that appetizing (raw fish wrapped in seaweed? Hmm.).

Well, it turns out every one of my assumptions were wrong! At least from the way we made it. :) Wesley is definitely the most adventurous of us all when it comes to food, so when he found out that one of our friends knows how to make sushi, he arranged a sushi-making party! It turned out to be a fun and memorable night. I enjoyed it so much, so I thought I’d share with y’all how we made if you would like to try it, too.

IMG_7172

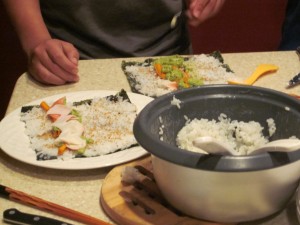
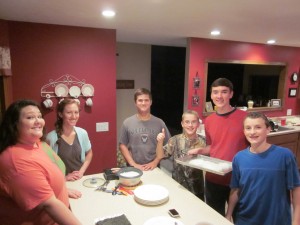
All the sushi-makers!

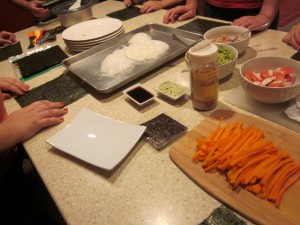
Here’s what you need:

nori -seaweed- sheets (you can usually find these in the Asian section at Walmart)
jasmine rice, cooked according to package directions and sprinkled with rice wine vinegar
sesame seeds
cream cheese, cold and cut into thin strips
avocado, mashed
cucumber, cut into long strips
carrots, cut into long strips
crab meat (we used Trans-Ocean Crab Classic Flake Style Imitation Crab from Walmart)
soy sauce

IMG_7176

And here’s what to do:

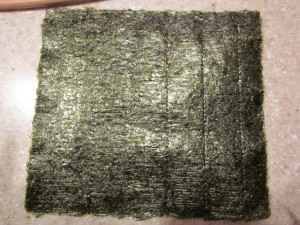
IMG_7175

Take a nori sheet and place it on a clean surface (we just made our directly on our counter). Nori sheets have two sides. One side is shinier than the other and the shinier side should face down, with the “rougher” side facing up. The rough side helps to absorb the moisture of the rice.

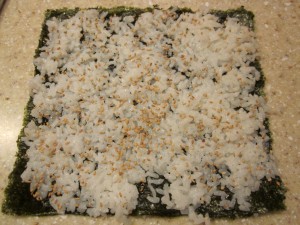
IMG_7181

Spread with a thin(ish) layer of rice and sprinkle with sesame seeds.

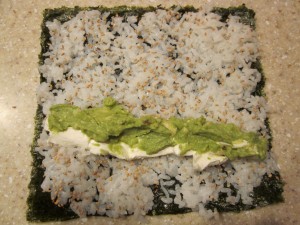
IMG_7182

Add cream cheese and mashed avocado in a strip toward one end of the nori sheet like this.

IMG_7183

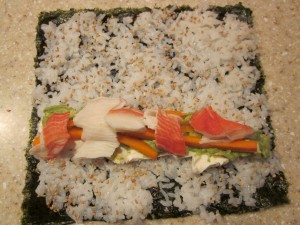
Add crab meat, carrots, and cucumber.

IMG_7184

IMG_7187

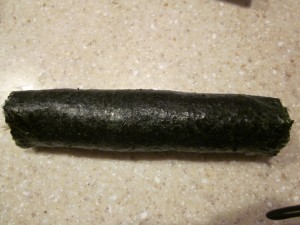
Carefully roll up into a tight log. You can use a bit of water along the crack to help seal the roll.

IMG_7192

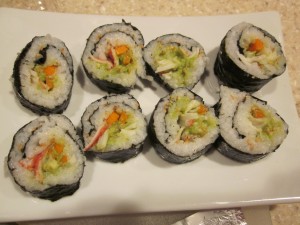
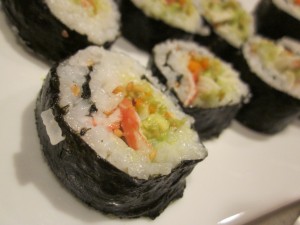
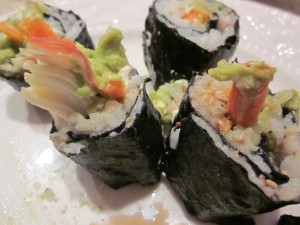
Use a sharp knife (I like serrated ones) to cut the log into sections. Some nori sheets have perforated lines you can use to cut along. Arrange on a platter.

IMG_7190

(Aren’t they pretty!?)

Now I must add here that there were some major perfectionists in our group and some, ahem, major non-perfectionists in our group who shall remain anonymous. :)

IMG_7194

Well, okay, I’ll just say that these were mine. Hehe. But my next ones looked better after I used a serrated knife!

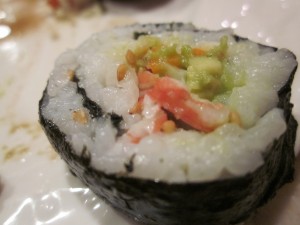
Sushi are not only tasty little morsels, but also very filling! We made enough for everyone to eat about 1 1/2 rolls, which was plenty. We used shallow dishes of soy sauce for dipping. Yum! Soooo tasty. Here are a few more pictures. 
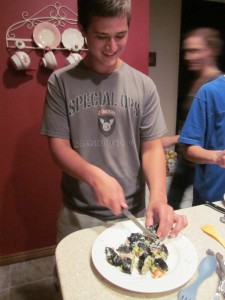
IMG_7195
IMG_7197
Austin mastered the art of chopsticks.

IMG_7216

And Wesley pretending to be in “deep meditation” before eating the very last piece of sushi. Silly guy! :D

So thus ends our sushi-making adventures. We have since made it again and I am sure we will make it in the future. There are so many different ways to make sushi…do you have any experience with sushi and what do you put on yours?
Homemaking

6-layer healthy pumpkin cake!


IMG_1750
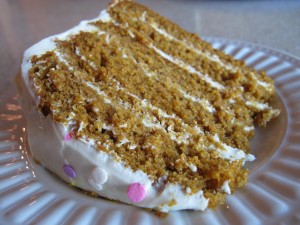
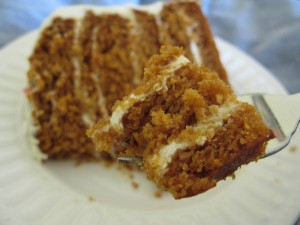
Yesterday was Mom’s birthday. It was lovely. We went on a walk, had tea & cake doughnuts, watched Emma, played Scrabble, and I made Mom’s favorite 6-layer pumpkin cake, which I’ll share with you today. Now Mom’s birthday dessert has morphed over the years. At first it was store-bought pumpkin pie, because that’s her favorite kind of pie. After I learned how to bake, I would make it from scratch. The problem was, however, that nobody else in our family really liked pumpkin pie. So we moved on to these pumpkin bars, which everyone liked. But THEN I found this recipe! It took a bit of experimenting to figure out pans, baking time, etc, but I do believe I have perfected it to our family’s liking, appealing to both the pumpkin lovers and non-pumpkin lovers alike. :) You probably couldn’t tell that it’s healthier than most cakes. And to let you in on a little family secret…sometimes we eat it for breakfast the next day! Okay, it’s not a secret anymore. :)

IMG_1760

Healthy pumpkin cake

1 1/2 cups honey
1 cup olive oil
4 eggs
1 (15 oz) can pumpkin
3 cups whole wheat flour
2 teaspoons cinnamon
1/2 teaspoon allspice
1 Tablespoon baking powder
2 teaspoons baking soda
1 teaspoon salt

Preheat oven to 350 degrees. Heavily grease three 8 or 9-inch round cake pans and set aside. Mix together all ingredients in order listed. Pour into prepared pans. Bake 23-25 minutes, until toothpick inserted in the middle of cake comes out clean. Flip out of pans and cool completely on wire rack. Carefully slice each cake round in half and frost each layer with recipe below:

Best cream cheese frosting 
I like this recipe so much because it’s not sickly sweet and has a light, creamy texture and a wonderful flavor from the vanilla and maple syrup.

12 oz cream cheese (1.5 8-oz packages)
1 stick butter, softened
1/4 cup pure maple syrup (optional)
1 teaspoon vanilla
3 cups powdered sugar

In an electric mixer, beat the cream cheese and softened butter very well. Add in the maple syrup, vanilla, and powdered sugar, and continue to beat on high speed for 2-3 minutes, or until a light, creamy texture is achieved. Be sure to save some for the cake, as little tasters will come running from all directions! :D

Homemaking

Almond Flour Cookies

Hi there! It’s been a lovely Wednesday morning. I saved studying for the afternoon, so after a late family breakfast, I made 10-grain bread, these granola bars, and worked on my piano piece, among other projects. I am learning to play one of my favoite pieces of music: it’s called “All of Me” by Jon Schmidt. After listening to it I looked up the sheet music and was surprised to find it within range of my limited musical abilities! I’ve finished 4 pages so far. I love to close a textbook after a bout of studying, run downstairs to the piano, and play to my heart’s content. What a blessing!

Anyways, back to the reason for this post. I have a recipe for almond flour cookies to share with you today. I love baking with almond flour. Mom and I have been looking for good wheat alternatives to cut back on grains. Of course we’re not entirely opposed to wheat, but we didn’t want to be using it in all of our baking. I want to do more research on grains and gluten in the future.

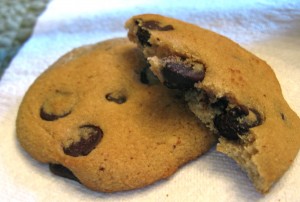
I tried several versions of almond flour cookies before settling on this one. The first ones I made were from Elana’s Pantry (a food blog). They were made with agave nectar and though tasty, turned out too mushy and soft. They didn’t really stay together after baking. The next ones I tried were from the Wheat Belly Cookbook. Being sweetened with only a bit of liquid stevia, they weren’t very sweet. At all. But I liked the texture, so I added in some brown sugar, added a bit more flour, and cut back on the baking time. The result was just what I was looking for: a lightly sweet cookie with a soft, but not mushy texture which held its shape. Yum! I would seriously prefer these over any wheat chocolate chip cookie.

You can make your own almond flour or buy it. Almond meal is basically the same thing, so you could use that, too. I have made these with both blanched and unblanched almond meal. You can try variations of these cookies by rolling them in cinnamon sugar for snickerdoodles or adding in oats and raisins.

IMG_1619

Almond Flour Cookies

⅔ cup brown sugar
½ cup butter or coconut oil, melted
4 eggs
¼ cup sour cream or yogurt
2 teaspoons vanilla extract
½ teaspoon liquid or powdered stevia

4 ⅓ cups almond meal/flour
1 teaspoon baking soda
½ teaspoon sea salt

2 cups dark chocolate chips

(1) Preheat your oven to 350 degrees. Line a baking sheet with parchment paper.

(2) Mix together the wet ingredients with an electric mixer. Mix well, then add the dry ingredients. Stir in the chocolate chips last. Don’t worry, the dough is supposed to be wet. :)

(3) Drop by tablespoons onto the baking sheet. Use your hands to flatten each cookie to desired thickness, as they won’t spread much during baking. Bake for 12-15 minutes, until edges are lightly brown. Let cool completely on a wire rack. This recipe makes about 3 dozen large cookies. Enjoy!

Well, the boys are home from town and ready for lunch, so gotta scoot! Have a blessed afternoon.